

Ring door bell installation
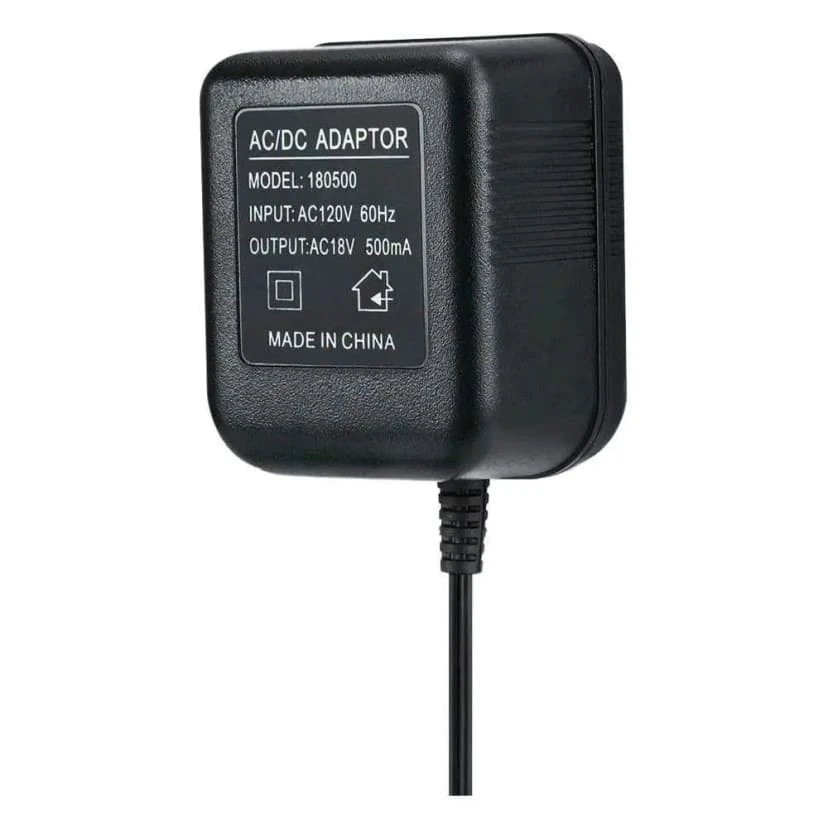
yesterday we had a ticket on our schedule to help customer install a ring doorbell. When we arrived, we realized that the customer had a wireless doorbell. Right next to it, was a face plate that cover where the old doorbell was. My guess is that doorbell stopped working. This can be two reasons, bad wiring or bad power supply. After we trace the cable down, we realize the the customer use to have a phone system install in this home. They had a intercom system tie to the phone system, therefore, the doorbell wiring did not had power to it. This create a small dilemma for us, we ended up ordering a power supply and have to make a second trip just to install a Ring door bell. After installing probably 30 ring door bell, we still are still on a learning curve. Welcome to the IT business! Related Guides Ring Doorbell Can Complement Most Security Camera Systems How to Choose the Best Security Camera System for Your Home or Business Protect Your Property with a Security Camera: The Ultimate Guide for Austin Reasons to Install a Security Camera System Understanding the Different Types of Security Camera Systems Residential vs. Commercial Security Camera Installation The Most Common Mistakes When Setting Up Security Cameras New Security Camera System Installation in Austin
WiFi 2.4ghz vs 5ghz Wireless Network Austin
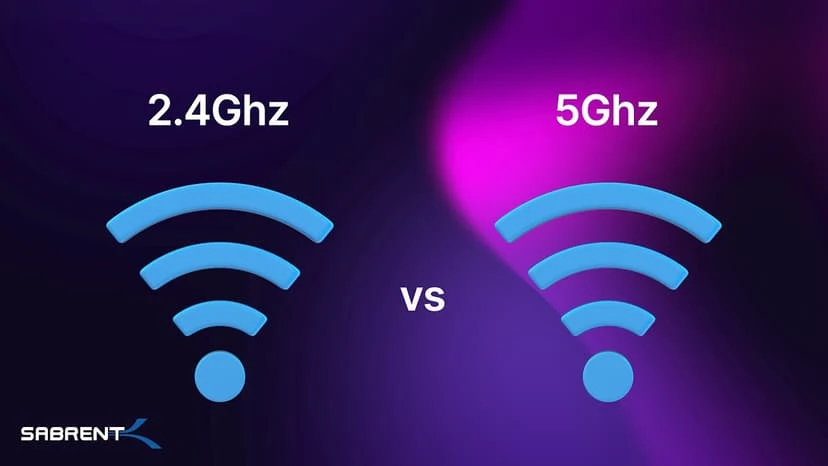
Often, you’ll find that your router or access point will give you the option of two Wifi band. There is no better option but just what works best for your situation. 2.4ghz band travels at longer wavelength which will allow the band to travel further distance and penetrate through walls and floor but is prone to interferences. These interferences can cause your internet speed to decline. 5ghz band travels at a shorter wavelength and offer more channels which is less prone to interference but it unable to travel in distance. Due to the shorter wavelengths, 5ghz band is able to give a higher internet speed depending on how far you are away from your source. Depending on what you are trying to accomplish, first ask yourself what you need the Wifi for and if speed and distance is a factor. This will help with where you want to place your router or access point in an area where speed is important but utilize the 2.4ghz band for distance. Related Guides Elevate Your Connectivity with Wireless Networking Services Enhancing Wi-Fi Performance: Bringing Access Points Closer to Users Why Wi-Fi Feels Slow in Some Rooms (and Why Reconnecting Often Fixes It) Replacing an Access Point with a Router 3 Types of Networks Every Business Should Know How Poor Data Cabling Affects Network Speed and Stability How Fiber Optic Installation Can Transform Your Business Connectivity Managed IT Services: The Complete Austin Guide
Understanding Subnetting: Why It’s Crucial in Networking
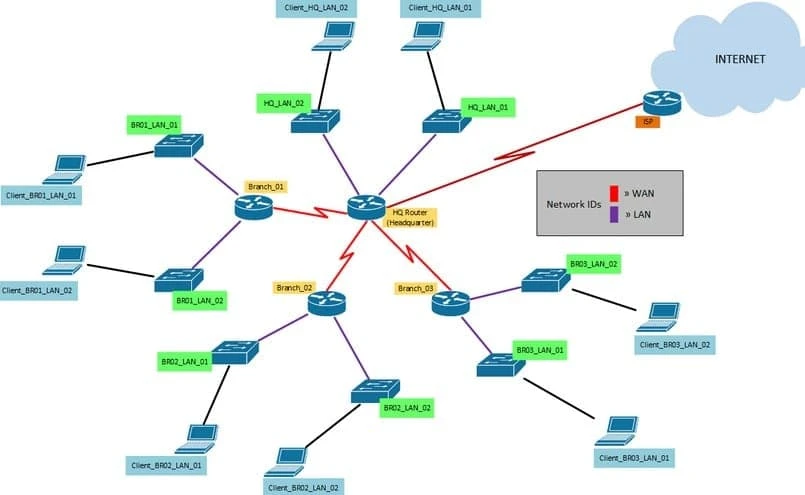
In the world of networking, efficient management of IP addresses is vital for the seamless operation of any network. One of the key techniques used to achieve this efficiency is subnetting. Managed IT services play a critical role in implementing and managing subnetting to optimize network performance and security. In this blog, we’ll explore what subnetting is, how it works, and why it’s so important in networking. What is Subnetting? Subnetting is the process of dividing a larger network into smaller, more manageable sub-networks, or subnets. Each subnet operates as a distinct network, but all subnets within the larger network can communicate with each other. This division helps improve the organization, security, and efficiency of network traffic. How Subnetting Works IP Address Breakdown: An IP address consists of two parts: the network portion and the host portion. Subnetting modifies the boundary between these two parts to create multiple smaller networks. For example, in an IP address like 192.168.1.0/24 , the /24 denotes the subnet mask, indicating that the first 24 bits are the network part and the remaining bits are for hosts. Subnet Masks: Subnet masks are used to define the network and host portions of an IP address. In the above example, 255.255.255.0 is the subnet mask corresponding to /24. By changing the subnet mask, you can create more or fewer subnets. For instance, a /25 mask (or 255.255.255.128) would split the network into two subnets, each with 128 possible addresses. Subnet Calculation: Managed IT services utilize subnet calculators and tools to accurately determine the subnet masks and address ranges required for specific network needs. This ensures efficient use of IP addresses and avoids conflicts. Why Subnetting is Important Improved Network Performance: Reduced Broadcast Domains: By dividing a large network into smaller subnets, broadcast traffic is limited to each subnet. This reduces congestion and improves overall network performance. Efficient Routing: Subnetting simplifies routing by allowing routers to handle smaller, more manageable groups of IP addresses. This enhances the speed and efficiency of data transfer across the network. Enhanced Security: Isolation of Subnets: Subnetting allows for the isolation of different segments of the network. This limits the spread of potential attacks and enhances security measures. Access Control: Administrators can apply specific security policies and access controls to each subnet, ensuring that sensitive data and resources are better protected. Scalability: Flexible Network Design: Subnetting provides the flexibility to expand the network without disrupting existing operations. New subnets can be created as needed to accommodate growth. Efficient IP Address Management: By breaking down a larger network into smaller subnets, IP address allocation becomes more efficient, avoiding wastage and ensuring that addresses are used optimally. Simplified Troubleshooting: Isolated Issues: Problems can be isolated to specific subnets, making it easier to identify and resolve issues without affecting the entire network. Improved Monitoring: Network monitoring tools can focus on individual subnets, providing more detailed insights into network performance and health. How Managed IT Services Help with Subnetting Managed IT services bring expertise and experience to the complex task of subnetting. Here’s how they assist: Assessment and Planning: Managed IT providers assess your network needs and plan the optimal subnetting strategy. Implementation: They configure routers, switches, and other network devices to implement the subnetting plan. Monitoring and Maintenance: Continuous monitoring ensures that subnets are functioning correctly and efficiently. Managed IT services also handle any necessary adjustments and updates. Security Management: They apply appropriate security measures to each subnet, ensuring robust protection against threats. Troubleshooting and Support: Expert support is available to troubleshoot and resolve any issues that arise within the subnets. Conclusion Subnetting is a fundamental technique in networking that enhances performance, security, and scalability. Managed IT services provide the expertise needed to implement and manage subnetting effectively, ensuring your network operates at its best. By partnering with a reliable managed IT service provider, you can optimize your network’s efficiency and security, supporting the growth and success of your business. Ready to Optimize Your Network with Subnetting? Contact BCS IT Services today to learn how our managed IT services can help you implement and manage subnetting for a more efficient and secure network. 512.257.1433 Related Guides 3 Types of Networks Every Business Should Know Importance of Network Security for Modern Businesses Managed IT Services: The Complete Austin Guide Supporting All 7 OSI Layers with Managed IT Services How Poor Data Cabling Affects Network Speed and Stability Elevate Your Connectivity with Wireless Networking Services How Fiber Optic Installation Can Transform Your Business Connectivity Endpoint Security: Protecting Every Device in Your Business
Long Distant Fiber Optic Cabling thru woods
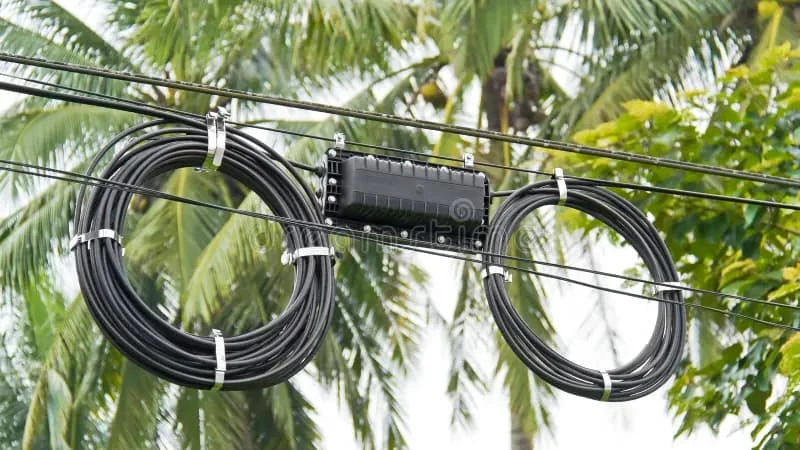
Long-distance fiber optic cabling through woods refers to the installation of high-speed fiber optic cables over vast, often challenging terrains like wooded areas. This solution ensures reliable and fast internet connectivity for remote locations, providing robust data transmission over long distances while minimizing signal loss. It’s commonly used in rural or undeveloped areas where traditional wiring methods may not be feasible. This week received a call from an existing customer that we helped in the past. The first time they call us, it was fairly urgent, yet a very small job. They had reached out to us, because they had another company running the fiber and terminate the fiber for them, however the fiber did not work. During the troubleshooting process, first thing we did was check for light. Well, it past the light test. Most of the time, you check for light, and it works, it typically work, unless the termination was so bad, that the loss exceeded the recommendation. So, we re-terminated the fiber connectors on both ends, and that was it. The customer are now up and running. Their network is now stable. Now that this customer trust us, they wanted us to help them install a long fiber cable. It was about 1 mile long. 1 mile distant for fiber is typically consider short, however, it is long for us, as we typically do fiber from buildings to buildings, on privately owned property, which most case are short runs. This run has a few challenge. 1st challenge was distant. 2nd challenge was that we had to run it thru the woods with different terrain (land was not level and there were some deep ditch). 3rd challenge was, how do we protect the cable from the element and nature (animals, rodents, etc). Running a conduit and burying it were not feasible. The customer wanted us to just lay it on the ground thru the woods. Our solutions was to go with outdoor, armored, fiber cable. It sounded, simple, however, armored fiber cable 1 mile long is pretty heavy, creating some challenges going thru dense wood with deep ditch. 4th challenge was, the woods were so dense, that we can easily get lost. Our solutions were to use google map, compass, and take our time, and do it in increments 100 feet run at a time. All in all, we got the job done, and more importantly, we learn by getting outside our comfort zone and explore. The IT business is hard and demand always willing to learn. If you are in the market for an IT company that can help you soft network or cabling infrastructure issues, give us a call. We offer free consultations. Related Guides Fiber Optics: The Backbone of Modern Networks How Fiber Optic Installation Can Transform Your Business Connectivity Fiber Optic Termination: Best Practices for Reliable Connections Outdoor-Rated Fiber for Commercial Installations Fiber Optic vs. Copper Against Lightning Low Voltage Wiring Contractor in Austin Why Professional Data Cabling Boosts Business Efficiency Managed IT Services: The Complete Austin Guide
Singlemode vs Multimode
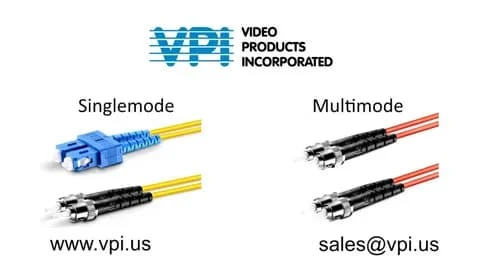
Singlemode (SM) generally cost cheaper than multimode (MM). The main question that we will typically ask our customer if they don’t know which fiber optic cable type to choose from is: What is the distance from one end to the other? What is the bandwidth that they require? Is it compatible with their equipment? Once they are able to answer these questions, we’ll be able to determine what is suitable for their current situation. Singlemode core is 5-6 times smaller than MM. This causes SM to have less light reflection and allowing SM to travel much further distance while carrying higher bandwidth. MM large core causes more light reflection and degrades over distance. An advance MM has is the ability to pass more data at a shorter distance. Related Guides Fiber Optics: The Backbone of Modern Networks How Fiber Optic Installation Can Transform Your Business Connectivity Fiber Optic Termination: Best Practices for Reliable Connections Fiber Optic vs. Copper Against Lightning Long-Distance Fiber Optic Cabling Through Woods Outdoor-Rated Fiber for Commercial Installations Low Voltage Wiring Contractor in Austin Why Professional Data Cabling Boosts Business Efficiency
RESET ROUTER TO FACTORY DEFAULT, DON’T BE SO FAST TO DO IT.
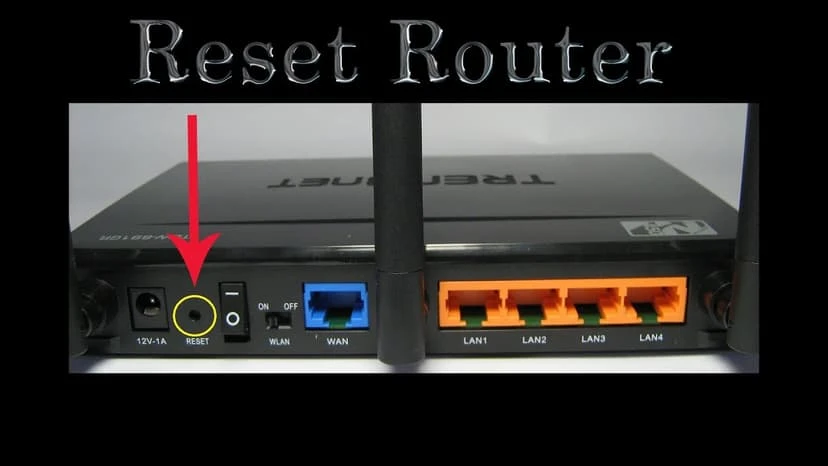
Resetting your router to factory defaults should be a last resort when troubleshooting network issues. While it may seem like a quick fix, this process erases all personalized settings, such as Wi-Fi name (SSID), password, port forwarding, and security configurations. Before resetting, try simpler troubleshooting methods like restarting the router or checking the connection settings. If a reset is necessary, make sure to back up important configurations to avoid the hassle of reconfiguring everything from scratch. We get a few call a month from customer and or potential customer asking us to come help them with their down network. Typically, either their internet is down, their network is down, or both. We have notice from asking customer questions, that the ISP (internet service provider), always ask them to reset the router / modem by holding down the little button on the router with a paper clip or pin. If you are asked by the service provider to reset your equipment, DON’T DO IT. What that button does is typically delete all the programming in your router, from ip address scheme, subnet mask, static ip address, password, wifi router username, etc. I think most of the time, the service provider tech support meant to do this on their modem and not the customers router. The reality is most of the tech support personnel are just supporting thru documentations, in another word, they don’t understand networking, just was train to read the documents and follow the few simple steps, just as reboot, reset, etc. I found too far often times, your internet doesn’t work is simply because the ISP modem programming does not match with your network and or router. Here are some examples: 1. Your router is programmed to have a static ip address, but your service provider is only assigning you dhcp (default on most isp). 2. Your router is programmed to received dhcp, but the service provider modem is programmed to pass you a static public ip address. 3. The service provider ip address doesn’t match your router or it match up as in conflict with your ip address scheme. If the service provider is passing on ip subnet 192.168.1.0/24 and your router is also program to hand off the same subnet of 192.168.1.0/24 subnet to your devices on your network, your network will not work properly. Network can get complicated, before you reset your router to factory default, have a qualify IT personnel help you troubleshoot first, it may save you and your company some money, downtime, and even some headache. Related Guides Managed IT Services: The Complete Austin Guide Elevate Your Connectivity with Wireless Networking Services Why Wi-Fi Feels Slow in Some Rooms (and Why Reconnecting Often Fixes It) Wi-Fi 2.4GHz vs. 5GHz: Which Band Should You Use? 3 Types of Networks Every Business Should Know Understanding Subnetting: Why It’s Crucial in Networking How Poor Data Cabling Affects Network Speed and Stability Importance of Network Security for Modern Businesses
OUTSIDE PLANT FIBER OPTIC CABLE
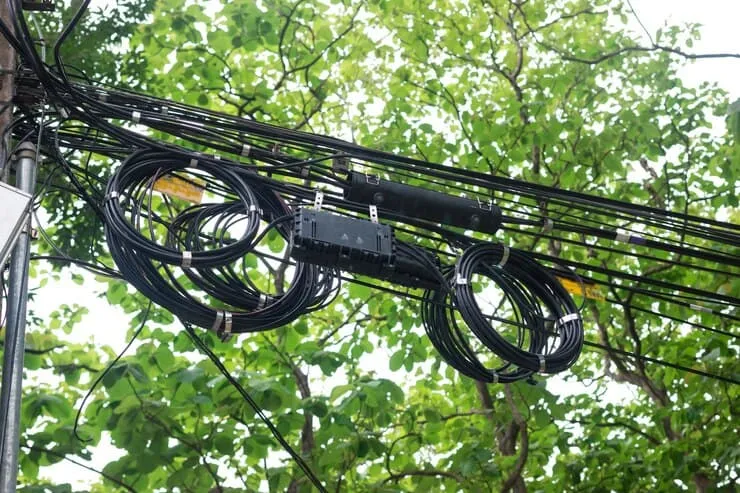
It’s been a while since I had to run an outside Fiber Optic cable as I been pencil pushing. It feels good to be able to go outside, break a sweat, and make some money. It was a hot day though. A co-worker and I had to pull and push some outside fiber optic cable 12 strand thru a conduit that was collapse at midpoint. We tried to fish it multiple times with no luck. We even tried the air compressor trick. All we got was some fresh or no so fresh stagnant water that felt like sewage water. We ended up having to cut into the pipe and create a new route for the new cable. It wasn’t so bad, kind of like a part time dirty job. Well, at the end of the day, we got the job done, just a few set back. If you are in need of a small company that can get a fiber optic cable run for you, give us a call. We sometimes can do smaller odd jobs that most big company doesn’t want to do. Related Guides Fiber Optics: The Backbone of Modern Networks How Fiber Optic Installation Can Transform Your Business Connectivity Fiber Optic Termination: Best Practices for Reliable Connections Long-Distance Fiber Optic Cabling Through Woods Outdoor-Rated Fiber for Commercial Installations Singlemode vs. Multimode Fiber Fiber Optic vs. Copper Against Lightning Low Voltage Wiring Contractor in Austin
Step-by-Step Guide to Installing Security Camera Cabling
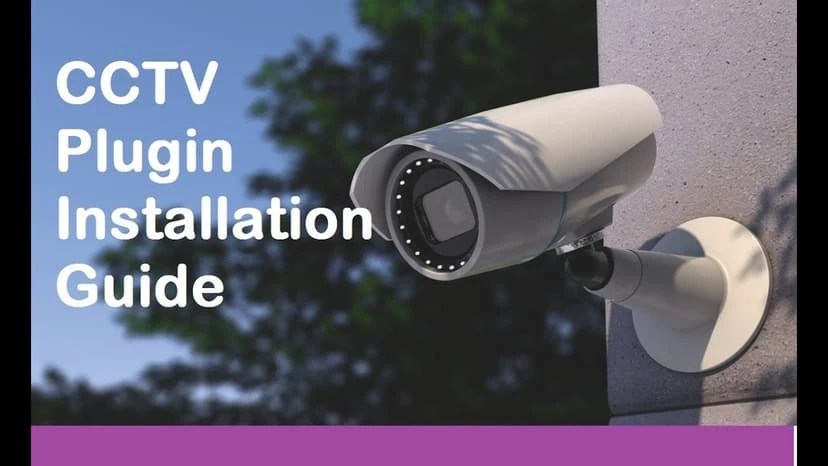
A well-installed security camera cabling system does more than just make your setup look clean. It makes sure that your surveillance footage is reliable, your equipment stays connected, and your system performs at its best. Whether you’re protecting your home or setting up a large commercial CCTV network, getting the cabling right from the start is essential. In this guide, we’ll walk you through everything you need to know to install security camera cabling like a pro. Here’s what we’ll cover: Planning your security camera wiring setup Choosing the right cables & tools Step-by-step CCTV cable installation process Testing & troubleshooting tips By the end, you’ll have a solid understanding of how to run and connect data cabling for security cameras in a secure, efficient, and future-ready manner. Chapter 1: Pre-Installation Planning Before you pick up a drill or unwind your first cable roll, take some time to plan things out. Good planning helps you avoid common problems and makes sure that your cameras cover the right areas without wasted materials or last-minute adjustments. 1. Choose the Camera Placement Start by deciding where your cameras should go. Think about the areas you most want to protect. These are usually: Entry points like doors, garages, and gates Blind spots that are not easily visible from your windows or other cameras High-traffic zones like hallways, driveways, or stairwells Once you’ve picked the key areas, take a walk around the space and imagine the camera angles. Mount a temporary camera or even use your phone on a tripod to test the view. You want wide, clear coverage; no walls or trees blocking the feed. Also, check for power sources. Are you using Power over Ethernet (PoE) or a traditional power setup? PoE cameras get both power and data from a single Ethernet cable, which can simplify installation. If you’re using analog or non-PoE cameras, you’ll need to think about where to plug in the power separately. 2. Choose the Right Cabling Not all cameras use the same kind of wire. What you choose depends on your system type and how far you need to run the cables. Ethernet (Cat5e/Cat6) Used with IP cameras, these cables carry both power and data when connected through a PoE switch or injector. Cat6 is better for longer distances and higher speeds, but Cat5e is still common and works well for most home systems. Siamese Cable This cable combines video (coaxial) and power (2-wire DC) in one jacket. It’s typically used with analog CCTV systems. Each camera will have two connectors—one for video, one for power. Fiber Optic If you’re running cameras very far, like across a warehouse, parking lot, or between buildings, fiber is ideal. It handles long distances without signal loss and supports high-definition feeds. 3. Gather Necessary Tools To keep things smooth and safe, have the following tools ready: Drill & fish tape for making and guiding cable paths through walls or ceilings Crimping tool & RJ45 connectors to terminate Ethernet cables properly Cable tester to check if your connections are correct Cable clips & conduit for securing and protecting your cables Having everything nearby before you start can save you multiple trips back and forth. Chapter 2: Running Security Camera Wires With your plan in place and your tools ready, it’s time to run the actual wires. This part takes a bit of patience and precision, but it’s totally manageable if you follow each step carefully. Step 1: Map the Cable Routes Start by deciding how each cable will run from the camera location to the DVR/NVR or network switch. Keep these things in mind: Avoid electrical lines. Running your cables too close to power wires can cause interference, especially in analog systems. Use safe, hidden routes. If possible, run cables through an attic, crawl space, or behind walls. This protects the wire and keeps your installation looking clean and professional. Draw a simple diagram and mark the points where the cables will enter and exit walls or ceilings. Step 2: Drill Access Holes Use a small drill bit to make holes for your cables to pass through. The size should match your cable width, but leave just a little room for movement. Drill from inside to outside so you can see where the bit comes out. After feeding the cables, seal any holes with silicone caulk to block out moisture, dust, and bugs. Be sure not to drill into any electrical wires or pipes. Use a stud finder or consult building plans if you’re unsure. Step 3: Pull & Secure Cables Now for the fun part, pulling the cables through! Use a fish tape or a wire coat hanger to guide the cable through tough spots. As you pull the cables: Label both ends of each one. You’ll thank yourself later when you’re connecting everything. Leave extra slack (1–2 feet) at both the camera and DVR/NVR ends. This gives you room to move or adjust connections later. Secure the cables with clips or run them through conduit to protect them from wear, rodents, or accidental tugging. Taking the time to do this step neatly makes future maintenance much easier. Chapter 3: Terminating Connections Once your cables are in place, it’s time to attach connectors so your cameras can actually communicate with your system. This is called “termination.” For Ethernet (PoE) Cameras Ethernet cables need to be stripped, arranged in the correct order, and terminated with an RJ45 connector. Here’s how to do it: Strip the outer jacket of the cable using a wire stripper. Untwist the wire pairs and arrange them in the T568B color order: White/Orange, Orange, White/Green, Blue, White/Blue, Green, White/Brown, Brown Insert the wires into the RJ45 connector until they reach the end. Use a crimping tool to lock the connector in place. Plug the cable into a tester to make sure everything is working properly. For Analog CCTV (Siamese Cable) These require separate terminations for video and power. Connect BNC connectors to the coaxial (video) part. Strip the
Common Security Camera System Problems and How to Fix Them
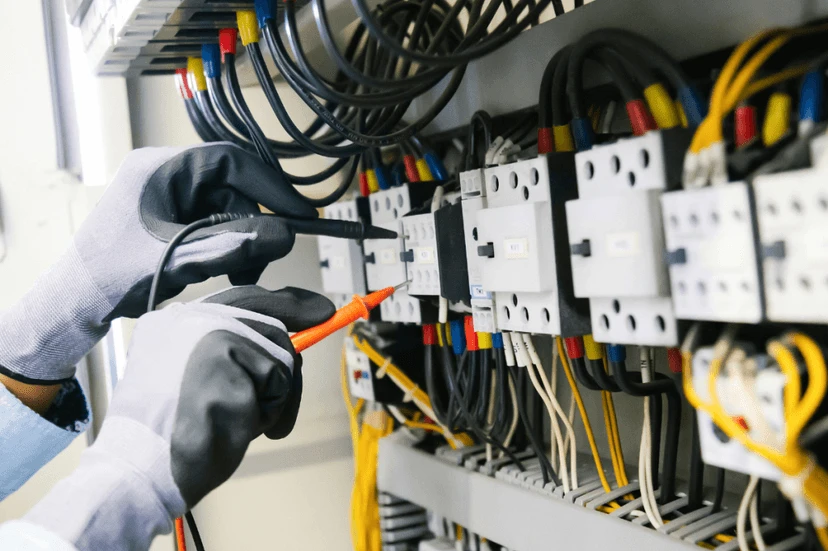
A security camera system is essential for protecting your home or business, but it isn’t immune to trouble. From a broken security camera that simply won’t power on to fuzzy nighttime footage, these issues can leave you and your entire home or business vulnerable. Learning simple DIY security camera troubleshooting tricks can save you time and money. And for tougher issues, knowing when to call CCTV repair technicians or experts makes sure of reliable, professional help. This guide discusses the most common security camera repair issues, offers easy fixes you can try yourself, and points out when it’s best to hire the pros. Top Security Camera Problems And Quick Solutions 1. Camera Not Powering On Possible Causes Loose or damaged power cables A faulty power adapter or PoE switch Tripped circuit breaker DIY Fixes Double-check every connection. Tug gently on cables to confirm they’re seated correctly. Swap the power adapter with a known-good one or test the outlet with another device If using Power over Ethernet (PoE), verify the network switch is delivering power to that port. Look at your breaker panel to reset any tripped switches. When to Call a Professional If you’ve replaced cables and adapters but the camera still stays dark, contact a CCTV repair service or Business Communication Solutions provider. They can test voltage, inspect internal components, and safely replace damaged parts. 2. No Video Signal or Blank Screen Possible Causes Loose or damaged BNC/RCA cables on analog systems Faulty DVR/NVR recorder The wrong input source is selected on your monitor or TV DIY Fixes Firmly reconnect all video cables, including any adapters. Power-cycle the DVR or NVR: shut it down, wait thirty seconds, then restart. Cycle through your monitor’s inputs (HDMI, VGA, BNC) until the camera feed appears. When to Call a Professional If the screen remains blank after checking every cable and input, schedule a surveillance system diagnostic. Technicians can test the recorder’s internal board and replace failed components. 3. Poor Video Quality (Blurry or Pixelated Footage) Possible Causes Dirty or foggy camera lens Low-resolution recording settings Weak Wi-Fi signal on wireless cameras DIY Fixes Gently wipe the lens with a microfiber cloth, so as not to use household cleaners. Log in to your DVR/NVR menu and set the resolution to 1080p or higher if your camera supports it. For wireless cameras, move your router closer or add a Wi-Fi extender to strengthen the link. When to Call a Professional If image quality stays poor, even on wired cameras, a security system technician can inspect camera modules and replace failed sensors or upgrade your recorder to update to higher resolutions. 4. Night Vision Not Working Possible Causes Burned-out infrared (IR) LEDs Obstructions like spider webs or dirt The incorrect night vision mode was selected DIY Fixes Inspect the lens area under a flashlight. Remove any webs, dust, or debris. In the camera’s software settings, switch between IR and color-mode night vision. If LEDs have failed, many cameras allow you to swap out the LED board yourself. When to Call a Professional If the IR board is damaged or you’re unsure how to install replacement parts, reach out to a CCTV repair technician who handles full camera refurbishments. 5. Motion Detection Not Working Possible Causes Sensitivity set too low or too high Software glitches or outdated firmware Poor camera placement (too far from the action) DIY Fixes Adjust sensitivity sliders in the camera or recorder menu until motion is reliably detected. Reboot the camera and DVR/NVR to clear any software hiccups. Reposition the camera to cover the intended area without too much sky or roadway in view. When to Call a Professional If even the highest sensitivity fails to trigger alerts, a security system repair specialist can recalibrate motion zones or update firmware safely. 6. Camera Losing Connection (Wi-Fi/IP Cameras) Possible Causes Weak wireless signal Network congestion from too many devices Outdated camera firmware DIY Fixes Move your Wi-Fi router or camera closer together. Turn off or move competing electronics (microwaves, cordless phones) that share 2.4 GHz. Use the camera’s web interface or app to install the latest firmware. When to Call a Professional Persistent drop-outs may point to deeper network issues. A CCTV network specialist or Business Communication Solutions expert can run signal tests, adjust network settings, or install dedicated access points. 7. DVR/NVR Not Recording Possible Causes The hard drive is full Recording schedule or motion detection is disabled The hard drive has failed DIY Fixes Log in to your recorder and delete old footage or extend storage by adding a larger drive. Double-check recording schedules and ensure motion-triggered recording is on. Listen for clicking or grinding in the recorder, aka signs of drive failure. When to Call a Professional If the recorder shows drive errors or won’t format a new disk, call in a CCTV repair technician. They can replace the drive, recover data, and configure RAID or backup strategies if needed. Security Camera Maintenance Tips Regular upkeep is the easiest way to avoid unexpected failures and to make sure that your system runs smoothly: Clean Lenses and Housings Dust, dirt, and water marks blur the image and reduce night-vision clarity. Every one to two months, gently wipe each lens with a soft microfiber cloth. For outdoor cameras, check the housing seals and remove any cobwebs or debris that might block the view. Inspect Cables and Connections Over time, sunlight, moisture, and temperature swings can wear out cable jackets and connectors. Every quarter, trace each cable run and look for cracks, kinks, or loose plugs. Tighten any fittings and replace damaged sections to prevent intermittent power or video loss. Update Firmware and Software Manufacturers regularly release firmware updates that patch security holes and improve performance. Log in to your camera’s web interface or mobile app every few months to install the latest updates. Keeping your system up to date reduces glitches and adds new features. Test Your Cameras Monthly A quick check ensures you catch problems early. Walk around your property,
EXTERIOR CABLE RUN
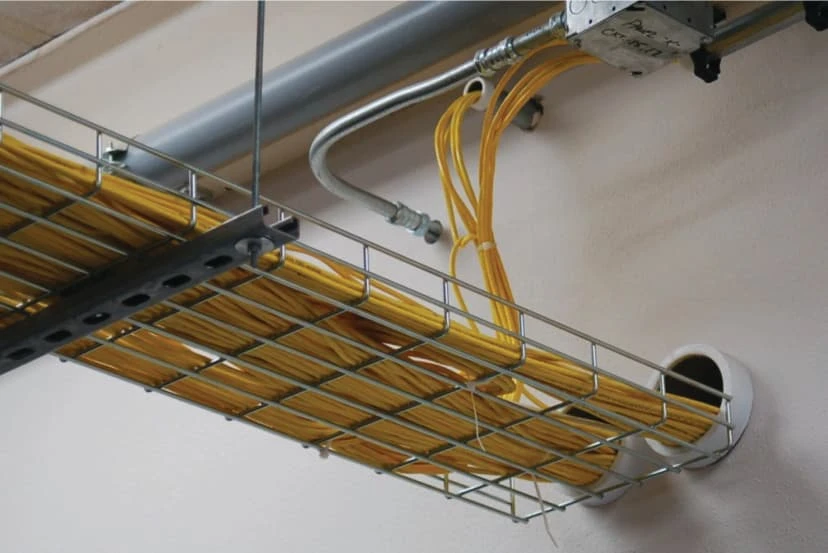
Exterior Cable Run refers to the installation and routing of cables along the exterior of a building or structure. This type of cable installation is typically used for electrical wiring, communication cables (such as fiber optic or coaxial cables), and networking cables, especially in situations where running cables through walls or ceilings is not feasible or practical. A customer contacted us today to add on two cables for their home. Once we arrived, we were told that they were quoted extremely high through others for the same two run. We proposed if they were looking into saving some money, we can run the cables on the exterior walls inside and outside their home. Their home was a two stories home with no attic access on the first floor. The other option of running the cables within the walls but that would involve a lot of time due multiple sheetrock cut outs, patching, and painting. At the end of the day, they went with the cable being exterior to save time and money. Related Guides Low Voltage Wiring Contractor in Austin Why Professional Data Cabling Boosts Business Efficiency How Poor Data Cabling Affects Network Speed and Stability Voice and Data Cabling Services Fiber Optics: The Backbone of Modern Networks Outside Plant Fiber Optic Cable Outdoor-Rated Fiber for Commercial Installations How Fiber Optic Installation Can Transform Your Business Connectivity