

Changing Floorplan

Changing Floorplan refers to the process of altering or redesigning the layout of a physical space, typically for improving functionality, aesthetics, or accommodating new needs. It may involve reconfiguring walls, furniture placement, or overall room usage. In business and commercial environments, this could be done to optimize workflow, enhance customer experience, or support technological changes. In residential settings, it’s usually aimed at better utilization of space or improving comfort. Whether it’s a minor adjustment or a complete overhaul, changing a floorplan requires careful consideration of the space’s purpose, structure, and desired outcome. A customer of ours had ask us to come in and pre-run cables for them. They handed us a floorplan to follow and to have everything ready so once the cubicle is installed, we’ll just come in and drop them to each cubicle. The problem came when we arrived the day to drop the cables and the customer had changed the floor plan. This had cause 50% of the cables that was original ran to now being too short and unusable. We had to spend another couple day of work to sort what is useable and running new cables for the remaining amount. Related Guides Are You Planning an Office Move? Site Survey: The Foundation of a Reliable Network Installation Why Professional Data Cabling Boosts Business Efficiency Low Voltage Wiring Contractor in Austin Voice and Data Cabling Services Cable Management and a Clean Workspace Affordable and Reliable Data Network Services in Austin Managed IT Services: The Complete Austin Guide
The Power of 1 and 0: Understanding Binary and Its Importance in Networking

In the realm of computing and networking, the fundamental building blocks are the binary digits 1 and 0. These two digits form the foundation of all digital communication and data processing. Managed IT services play a crucial role in leveraging this binary system to ensure efficient and reliable network operations. In this blog, we’ll explore the significance of 1 and 0 in networking, how they work, and why they are essential for the digital age. What is Binary? Binary is a base-2 numerical system that uses only two symbols: 1 and 0. In contrast to the decimal system, which is base-10 and uses ten digits (0-9), binary is the language of computers and digital systems. Each binary digit is known as a bit, and a group of eight bits forms a byte. How Binary Works in Networking Data Representation: Bits and Bytes: All data transmitted over networks is represented in binary. Text, images, videos, and any other type of data are converted into sequences of bits. Encoding: Data is encoded into binary before it is sent over the network. For example, the letter ‘A’ is represented by the binary code 01000001. Data Transmission: Electrical Signals: In wired networks, binary data is transmitted as electrical signals, where a high voltage might represent a 1 and a low voltage a 0. Radio Waves: In wireless networks, binary data is transmitted using radio waves, with different frequencies or phases representing 1s and 0s. Light Pulses: In fiber-optic networks, binary data is transmitted as pulses of light, with the presence or absence of a pulse representing 1 and 0. Network Protocols: Communication Protocols: Protocols like TCP/IP, HTTP, and FTP use binary data to establish and manage communication between devices. Packetization: Data is divided into packets, each containing a header and payload, both of which are represented in binary. The header includes information like source and destination addresses, also in binary form. Why Binary is Important in Networking Efficiency: Simple and Reliable: Binary is straightforward and easy to implement in hardware. Digital devices can reliably detect the presence or absence of an electrical signal, light pulse, or radio wave. Speed: Binary systems allow for high-speed data processing and transmission. Digital circuits operate quickly because they only need to distinguish between two states. Standardization: Universal Language: Binary provides a standardized way to represent and communicate data across different devices and networks. This universal language ensures compatibility and interoperability. Protocol Support: All networking protocols are designed to work with binary data, ensuring that devices from different manufacturers can communicate effectively. Error Detection and Correction: Parity Bits: Binary allows for simple error detection methods, such as parity bits, which help identify errors in transmitted data. Checksums: More complex error-checking techniques like checksums and cyclic redundancy checks (CRC) also rely on binary arithmetic to ensure data integrity. Security: Encryption: Binary is essential for data encryption. Encryption algorithms convert plaintext data into encrypted binary code, protecting it from unauthorized access. Authentication: Binary codes are used in authentication protocols to verify the identity of users and devices, ensuring secure network access. How Managed IT Services Leverage Binary in Networking Network Design and Implementation: Managed IT services design and implement networks that efficiently handle binary data transmission, ensuring high performance and reliability. Monitoring and Maintenance: Continuous monitoring of network performance includes checking the integrity and efficiency of binary data transmission. Managed IT services quickly identify and resolve issues related to data errors and transmission failures. Security Management: Implementing and managing encryption protocols to secure binary data during transmission and storage is a critical service provided by managed IT providers. Optimization: Managed IT services optimize network protocols and configurations to ensure efficient binary data handling, enhancing overall network performance and user experience. Conclusion The binary system, based on the simple digits 1 and 0, is the backbone of all digital communication and networking. Its efficiency, reliability, and universal standardization make it indispensable in the modern digital world. Managed IT services play a vital role in leveraging this fundamental technology to ensure robust and secure network operations. By understanding and utilizing binary, managed IT providers help businesses achieve optimal network performance and security. Ready to Optimize Your Network with Expert Managed IT Services? Contact BCS IT Services today to learn how we can help you harness the power of binary for a more efficient and secure network. Call us now 512.257.1433 to schedule your free consultation session. Related Guides Network Terminology: Essential Networking Terms Explained Understanding Subnetting: Why It’s Crucial in Networking Understanding DHCP and DNS: Essential Components of Modern Networks Cisco Router and Switch Command Line Network Troubleshooting and Support Supporting All 7 OSI Layers: How Managed IT Services Ensure Seamless Networks 3 Types of Networks Explained Affordable and Reliable Data Network Services in Austin Importance of Network Security for Modern Businesses
EXPANDING BUSINESS OUT OF STATE

We are proud to assist one of the in demand company in Austin. Along with phone system and networking, we also provide monthly maintenance services for their business for so many years now. When they expanded and opened another facility out of state, with their confidence in Business Communication solution. They hired us to go to a different state to install every network communication their office needed. We installed their phone system, computers, credit card machines, printers and intercoms. Being able to work with a very well known and admired businesses for so many years keep us motivated and inspired. We believe in keeping our services very professional and affordable our clients can rely on. To get more information on what else we provide click on our website at https://bcs-ip.com and we will be happy to assist you. Related Guides Managed IT Services: The Complete Austin Guide Why the Right Managed IT Provider Is Essential for the Future Affordable and Reliable Data Network Services in Austin How Business Communication Solutions Enhance Your Projects with Cost Savings Selecting the Right VoIP Phone Service for Your Business Low Voltage Wiring Contractor in Austin How Fiber Optic Installation Can Transform Your Business Connectivity Are You Planning an Office Move?
Discarding Old Equipment

Here at BCS, we’ll wipe out all data off each device before removing them from the devices to discard. Once those process is complete, we’ll then donate or recycle the device. By wiping the hardware used to storage data and removing it from the devices, we’ll ensure that no data will end up in the wrong hands. Related Guides Managed IT Services: The Complete Austin Guide Why the Right Managed IT Provider Is Essential for the Future Protecting Your Business: The Vital Role of Cybersecurity in Managed IT Importance of Network Security for Modern Businesses Affordable and Reliable Data Network Services in Austin Managed IT Journey: From Reactive to Proactive Support Windows Server 2022 Preview Has Been Released Disk Clean Up Tools: Freeing Up Storage the Right Way
SD-WAN: Transforming Network Management for Modern Businesses

What is SD-WAN? SD-WAN stands for Software-Defined Wide Area Network. It’s an innovative approach to managing and optimizing a wide area network by decoupling the network hardware from its control mechanism. This separation allows for more agile and cost-effective network management, providing businesses with the ability to centrally control and monitor their entire network through software. Key Benefits of SD-WAN Enhanced Performance SD-WAN intelligently routes traffic across the most efficient path, whether it’s MPLS, broadband internet, or LTE. This ensures that critical applications get the bandwidth they need, leading to improved performance and user experience. Cost Savings Traditional WANs often rely on expensive MPLS circuits. SD-WAN reduces the dependency on these costly circuits by enabling the use of more affordable broadband connections without sacrificing performance or reliability. Simplified Management With a centralized control panel, IT teams can easily configure, manage, and troubleshoot network issues. This reduces the complexity associated with traditional WANs and allows for more streamlined operations. Increased Security SD-WAN includes robust security features such as encryption, firewalls, and VPNs. It can also integrate with existing security protocols, providing a comprehensive security posture across the network. Scalability As businesses grow and expand, their networking needs evolve. SD-WAN provides the flexibility to scale up or down quickly, accommodating new locations, users, and applications without the need for significant infrastructure changes. How SD-WAN Supports Modern IT Initiatives Cloud Integration With the rise of cloud-based applications and services, SD-WAN offers seamless integration with cloud providers. It ensures secure, high-performance connections to cloud environments, facilitating smooth and efficient access to essential business applications. Remote Work Enablement In today’s hybrid work environment, SD-WAN provides secure and reliable connectivity for remote workers. It ensures that employees can access corporate resources from anywhere, maintaining productivity and collaboration. IoT Connectivity The Internet of Things (IoT) is transforming industries, and SD-WAN supports the connectivity needs of IoT devices. It ensures secure and efficient data transfer, enabling businesses to leverage IoT for better operational insights and efficiencies. Real-World Applications At Business Communication Solutions, we’ve seen firsthand how SD-WAN transforms businesses across various industries: Retail Retail chains use SD-WAN to connect their stores, ensuring consistent performance for point-of-sale systems and customer Wi-Fi. Healthcare Healthcare providers leverage SD-WAN for secure, high-speed access to patient records and telemedicine services, improving patient care and operational efficiency. Manufacturing Manufacturing companies implement SD-WAN to connect their production facilities, enhancing communication and real-time data analysis for better decision-making. Why Choose Business Communication Solutions for SD-WAN? As a leading managed IT service provider, Business Communication Solutions offers comprehensive SD-WAN solutions tailored to your business needs. Our expertise in network management and our commitment to customer satisfaction ensure that your transition to SD-WAN is smooth and successful. Customized Solutions We work closely with you to understand your specific requirements and design an SD-WAN solution that aligns with your business goals. Expert Support Our team of experienced IT professionals provides ongoing support and monitoring, ensuring your network operates at peak performance. Future-Proof Technology We stay ahead of industry trends to offer you the latest SD-WAN technology, keeping your business competitive and ready for future challenges. Conclusion SD-WAN is more than just a networking solution; it’s a strategic asset that can drive your business forward. At Business Communication Solutions, we’re dedicated to helping you harness the power of SD-WAN to achieve your business objectives. Contact us today to learn more about how SD-WAN can transform your network and support your growth. Stay tuned to our blog for more insights and updates on the latest in managed IT services and network solutions! Call us now for a free consultation session. 512.257.1433 Related Guides Affordable and Reliable Data Network Services in Austin Managed IT Services: The Complete Austin Guide Supporting All 7 OSI Layers: How Managed IT Services Ensure Seamless Networks Understanding DHCP and DNS: Essential Components of Modern Networks Understanding Subnetting: Why It’s Crucial in Networking Importance of Network Security for Modern Businesses Elevate Your Connectivity with BCS Wireless Networking Services in Austin How Fiber Optic Installation Can Transform Your Business Connectivity
Be available for the customers

We had a call from a new potential customer last week. He runs a countertop business in Austin. He just wanted a simple small phone system that can work with what he has, 3 analog lines. He currently have a 3 handset analog based that share 1 line. Their calls volume had exceeded that 1 line. It was a small office, under 10 employees. I asked him if he wanted VOIP, the latest and greatest, or does he wanted traditional. I think, I’m one of the few that still wants to offer the traditional digital phone system. Why would an IT company offer customer a system that is outdated? Because it made sense. It made sense for this customer. I’ve been in the IT industry for over 25 years now. I’ve moved to Austin in 1998. Well, that makes it 24 years as of this writing. I see far too many consultant always offering the latest and supposedly the greatest? The greatest to whom? After we talked, I was conveniently in front of my desk, with our system open. This time, I decided to give him a blind estimate on the spot based on what he told me about his phone system and cabling system. This was on a Friday. We agree to start on it Monday. When we showed up, he asked us if we could run 6 data cables for him. So our tech gave him a quote on the spot, and they both agreed to move forward with the install. Later in the afternoon, I arrived on site. My guys were done running the cable, installing the phones, and all that was left was programming the system, training the customer, and helping them setting up the auto attendant and voicemail system. Well at least that was what I thought. In the process of programming this NEC SL2100, I realized, it’s been a minute since I’ve program one from ground zero. It was fine, I call tech support and he walk me thru a few program that I’ve missed. While I was struggling with the program and waited for tech support to call me back, the customer had found more things for us to do. He asked us if we can install the existing paging system that has been abandoned for some time now. He also wanted us to run some speakers cable for him. So, while one of our other tech was running the speaker, I decided to test this paging system. So I’ve looked in the phone closet, I’ve saw the old 24V power supply for the paging system still plugged in. I was skeptical, but I went thru the process anyway of testing it. I’ve took the toner and plug it to the TIP and Ring (aka input of the paging horn), and it started YELLING (very loud toner signal). That made my day. That made the customer day. The paging horn still work. This is like watching antique archeology finding rusted gold under some rubble that still works. I think is this the longest blog I’ve ever written. It’s so weird how I’ve grown to enjoy writing. Maybe my passion for this business has came back to life! In the end, the customer cut us a check. He was so appreciative of what we’ve done. He keeps on talking about how we SHOWED UP, and did what we said we would do. These are the days that makes me feel good, especially after all the hard work. Time are so different, talk to so many business owners, they just wanted people to show up. Related Guides How Business Communication Solutions Enhance Your Projects with Cost Savings Selecting the Right VoIP Phone Service for Your Business Web-Based VoIP Phone System with Video Conference, Chat & CRM Managed IT Services: The Complete Austin Guide Why the Right Managed IT Provider Is Essential for the Future Benefits of Call Recording for Business Communications Phone Service in California: Business Communication Solutions Business Phone Systems: How to Choose the Right Solution
Navigating Government Mandates: Achieving NIST Certification by 2026
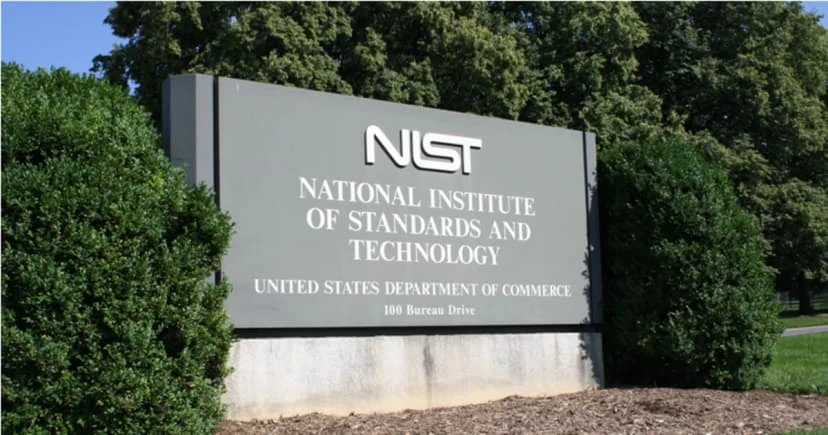
Understanding the NIST Mandate The National Institute of Standards and Technology (NIST) provides a comprehensive framework for improving cybersecurity across organizations. The NIST Cybersecurity Framework (CSF) and NIST Special Publication 800-171 are critical components that outline standards, guidelines, and best practices for safeguarding information systems and data. The government mandate requiring existing contract holders to be NIST certified by 2026 aims to: Enhance Data Protection Ensure that organizations handling government data implement stringent security measures to protect against cyber threats. Standardize Cybersecurity Practices Promote a uniform approach to cybersecurity across all government contractors, reducing vulnerabilities and improving overall security posture. Boost Confidence Provide assurance to stakeholders, including government agencies and the public, that contractors are capable of protecting sensitive information. Steps to Achieve NIST Certification Achieving NIST certification involves a series of steps designed to align your organization’s security practices with NIST standards. Here’s how you can get started: Understand the Requirements Familiarize yourself with the NIST Cybersecurity Framework and NIST SP 800-171 requirements. This includes understanding the control families and specific security measures you need to implement. Conduct a Gap Analysis Perform a thorough assessment of your current cybersecurity posture. Identify gaps between your existing practices and NIST requirements, and develop a plan to address these gaps. Develop and Implement Policies Create comprehensive cybersecurity policies and procedures that align with NIST standards. This includes access control, incident response, risk assessment, and continuous monitoring. Train Your Team Educate your employees about the importance of cybersecurity and the specific practices required for NIST compliance. Regular training sessions and awareness programs are essential. Deploy Security Controls Implement the necessary technical, administrative, and physical controls to meet NIST requirements. This may involve upgrading your IT infrastructure, deploying new security technologies, and enhancing your data protection measures. Monitor and Assess Continuously monitor your security posture and conduct regular assessments to ensure ongoing compliance. Use automated tools and processes to streamline this effort. Prepare for Certification Work with a certified third-party assessor to conduct a formal audit of your security practices. Address any identified issues and ensure all requirements are met before seeking certification. The Role of Managed IT Services in Achieving NIST Certification Partnering with a managed IT service provider like Business Communication Solutions can significantly ease the process of achieving NIST certification. Here’s how we can help: Expert Guidance Our team of cybersecurity experts has extensive experience in NIST compliance. We provide tailored advice and support to help you navigate the complexities of the certification process. Comprehensive Assessments We conduct thorough gap analyses and risk assessments to identify areas of improvement and develop a clear roadmap to compliance. Implementation Support From policy development to deploying advanced security controls, we assist you at every step, ensuring that your organization meets all NIST requirements. Ongoing Monitoring and Support Our continuous monitoring services ensure that your security measures remain effective and compliant. We provide regular updates and assessments to keep your cybersecurity posture strong. Conclusion The government mandate for NIST certification by 2026 underscores the critical importance of robust cybersecurity practices. At Business Communication Solutions, we’re committed to helping you achieve and maintain NIST certification, ensuring that your organization remains secure and compliant. Contact us today to learn more about our NIST compliance services and how we can support your journey to certification. Need a bit of help navigating NIST certification by 2026? Call us 512.257.1433 – we offer free estimate and a free consultation to help you get going. Related Guides Protecting Your Business: The Vital Role of Cybersecurity in Managed IT Importance of Network Security for Modern Businesses Is Your Business Network Secure? 12 Warning Signs You Need Professional Network Security Services Cloud Security: Protecting Business Data in the Cloud Managed IT Services: The Complete Austin Guide Why the Right Managed IT Provider Is Essential for the Future Supporting All 7 OSI Layers: How Managed IT Services Ensure Seamless Networks SD-WAN: Transforming Network Management for Modern Businesses
NETWORK SECURITY

Understanding the vulnerability of being attack online by cyber threats is very important nowadays. As the world runs through networking, sadly say, there are trained IT people that work to disrupt, damage, and destroy data just to gain information and money they can use for themselves. As simple as clicking an email can allow them to get into your system and get all the data they need, this is called “Phishing.” They can use all these important materials to get all the money that you have or simply alter your identity. Two major problems I rather not experience. As there are many more advanced techniques and trained cyber-terrorist out there to disrupt your everyday living, simply learning how to protect yourself is the main key in network security. Taking a course at FORTINET NSE Training Institute, I learned seven important ways to help protect my personally identifiable information and my device. 1. Don’t give out any important information or financial transaction from an unsure email, text, or voicemail. 2. Have a security mindset and ensure that all hyperlinks are coming from legitimate sources before clicking. 3. Make sure to use multi-step to confirm unique security code for validation to a system. 4. Make certain that you have the most updated protection on your computer, mobile device, and browser. 5. Always use different passwords in all your accounts and devices. 6. Always lock your screen device when it’s not being used. 7. It’s important to obey and follow the company policy. Be informed and always ask if you don’t know. As our world is rapidly changing in technology, we each have a role in protecting our own information. In the business industry, data is the new gold and our network security is something we prioritize. Related Guides Importance of Network Security for Modern Businesses Is Your Business Network Secure? 12 Warning Signs You Need Professional Network Security Services Protecting Your Business: The Vital Role of Cybersecurity in Managed IT Cloud Security: Protecting Business Data in the Cloud Supporting All 7 OSI Layers: How Managed IT Services Ensure Seamless Networks Understanding DHCP and DNS: Essential Components of Modern Networks Understanding Subnetting: Why It’s Crucial in Networking Managed IT Services: The Complete Austin Guide
7 Signs You Need Professional Security Camera

Installation Is your property truly protected, or are you just crossing your fingers and hoping nothing goes wrong? As security camera installation experts, we believe that the best defense is a strong offense. That means identifying and addressing vulnerabilities before they become real problems. A professionally designed and installed security camera system offers far more than a simple deterrent; it provides peace of mind, clear evidence when you need it, and a foundation for a broader security strategy. Below are the first two critical warning signs that it’s time to call in the experts, along with practical steps you can take to shore up your defenses. 1. You’ve Experienced Suspicious Activity Few things rattle the nerves more than realizing someone has been casing your property. Even if those break‐in attempts didn’t succeed, the very fact that they occurred means your site has caught someone’s eye, a red flag you can’t afford to ignore. Common Warning Signals Unsuccessful Break‐In Attempts:A forced lock, a bent door frame, or a pried window latch are all signs someone tried to get in. These “failed” incidents actually offer valuable intelligence entry points that the intruder judged weak enough to test. Unfamiliar Vehicles Circling:Whether it’s a beat‐up sedan slowly cruising your neighborhood or a white van parked out of place, unknown or repeatedly seen vehicles near your property often indicate surveillance by would‐be thieves. Evidence of Trespassing:Disturbed flower beds, footprints in mulch or gravel, broken branches. These subtle clues reveal unauthorized access and foot traffic you wouldn’t otherwise notice. Why a Professional System Helps Visible, well‐placed cameras can deter up to 60 percent of potential intruders, according to research. When a would‐be burglar sees a high‐quality dome or bullet camera, they know their image will be captured in detail. That visibility makes your property far less attractive than an unmonitored neighbor’s. But deterrence is only part of the story: if an incident does occur, professional cameras deliver crisp footage that helps law enforcement identify suspects and provides you with evidence for insurance claims. Next Steps Conduct a Vulnerability Walkthrough:Walk your site at different times of day, logging any suspicious activity or areas that feel exposed. Engage a Security Consultant:A trained technician can pinpoint blind spots you might miss, such as dark corners, side doors, or garage entrances, and recommend camera types suited to each location. Install Visible Cameras at Entry Points:Start by covering front doors, loading docks, and parking areas. A strategic placement of two or three cameras in these critical zones can dramatically improve your overall security posture. 2. Your Current System Is Outdated Technology evolves quickly, and what seemed cutting‐edge five years ago may now leave you dangerously under‐protected. If your existing setup is stuck in the analog era, you’re missing out on essential features that modern security systems offer. Signs Your Equipment Is Past Its Prime Blurry, Grainy Footage:Analog cameras often produce low‐resolution video that fails to capture license plates, faces, or small but important details. In an incident, unclear footage is little better than none at all. Limited Storage Capacity:A DVR that can only hold 24 hours of footage forces you to overwrite important recordings, leaving gaps in your historical record. No Night Vision or Poor Low‐Light Performance:If your cameras go blind in dimly lit areas, intruders can slip in under the cover of darkness. Lack of Smart Features:Without motion‐activated alerts, you’re left to sift through hours of uneventful footage. No remote access means you can’t check live feeds or review video when you’re offsite. Modern Upgrade Checklist A professional installation will typically include cameras and recorders that meet or exceed the following standards: 4K Resolution:Four times the detail of 1080p, 4K cameras capture every nuance of facial expressions, license plates, and product labels, making your evidence rock‐solid. Thirty‐Day Cloud Storage:Automatic off‐site backup ensures you never lose critical video, even if an intruder attempts to disable or steal your on‐site recorder. Smart Motion Detection:Advanced analytics can distinguish between a stray leaf fluttering and a person loitering, cutting false alarms and ensuring your alerts mean business. Night Vision with Color Mode:Infrared LEDs deliver clear black‐and‐white images in total darkness, while color‐mode cameras with supplemental lighting give true‐to‐life views after sunset. 3. You’re Expanding Your Property When you add a new wing, renovate a back lot, or build an addition, you’re not just gaining space—you’re also creating blind spots. Every fresh doorway, side entrance, or newly enclosed storage room becomes a potential access point for intruders if it isn’t monitored from day one. Think about those unmonitored entry points: a contractor’s side door that sees traffic during the build, a sliding glass patio door that wasn’t part of your original security plan, or a new service entrance tucked away behind landscaping. Valuable items—tools, equipment, or inventory—often end up stored in these new areas before you realize they need protection. And with added square footage comes more foot traffic: employees, delivery drivers, customers, and visitors all need clear paths in and out, making it harder to track comings and goings if you don’t have cameras in place. The best time to install cameras is while the walls are open and the electricians and network cabling are already on site. By integrating surveillance wiring into your construction or renovation plans, you save on labor costs, avoid patching and repainting headaches later, and ensure that each camera has a clean, concealed run back to your recorder. As soon as the drywall goes up, you’ll already have a hidden, tamper-resistant conduit waiting. This forward-thinking approach not only protects your new space from day one but also keeps your installation looking neat and professional. 4. Valuable Assets Are Unprotected Every business has its assets, whether that’s high-end production equipment, racks of inventory, cash registers, or even a curated collection of artwork or jewelry. When these assets aren’t under surveillance, you’re gambling with the entire foundation of your company. According to the FBI, the average business burglary results in losses of around $2,300. Compare that to the one-time investment
Outdated phone system with no features and 2 office that needed to be connected

Problems : A company has locations in both Austin and New Orleans and wants to tie the 2 together. Their current phone system is 10 – 12 years old and severely outdated. The existing system does not have features the company needs, such as: caller ID, voicemail and cell forwarding, voicemail to email, and auto attendant. They also need conference call capabilities to accommodate anywhere from 10 to 20 users. Due to having an old, outdated system they are also experiencing poor call quality and cannot transfer calls between locations. Often times they find that calls are not being routed correctly and voicemails end up in the wrong mailboxes. The main goal is to integrate and connect the 2 offices, while added features are also must-haves. The company needs a solution that will enable them to accomplish all of their goals while giving them the “bells and whistles” they are looking for in a phone system. Scenario Solutions : The most logical solution for these issues is to replace the entire old system at both locations with a new VoIP set up. This will allow them to connect both locations, as well as give them the features they want and need. They will receive IP phones with the capabilities they want and the auto attendant and voicemail features they need. A conference bridge will allow them the ability to have up to 30 users per conference with room to expand. The new phone system will also greatly improve sound quality and reliability. Pros : This solution allows the company to connect both offices, as well as give them everything they’re looking for feature wise. They can now transfer all calls between the 2 offices and properly route both calls and voicemails to the correct place. They will have a system in place that allows them to grow while addressing the lack of functionality of their outdated phones. Cons : The users are now dependent on their Internet connection and having a primary and secondary location. If the primary office goes down or experiences problems, it could affect the second location. The users must be properly trained in order to have a seamless transition from the old set up to the new one. Related Guides How to Choose the Right Business Phone System Selecting the Right VoIP Phone Service for Your Business Web-Based VoIP Phone System with Video Conference, Chat & CRM Benefits of Call Recording for Business Communications NEC SV9100 Phone System Troubleshooting NEC Phone System Issues How Business Communication Solutions Enhance Your Projects with Cost Savings Phone Service in California